Sanding the Body
 |
 |
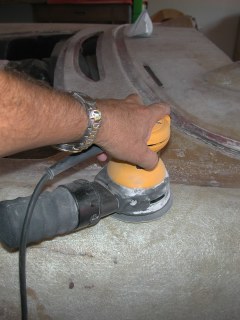
| The sanding process removes any remaining paint and primer, cleans the glass surface of all stripper residue and smoothes the glass (cuts any glass fibers raised during the stripping process). I use different methods; 1) a Dewalt Electric DA, 2) a pneumatic Orbital Sander and 3) Hand wet sanding. I use a sponge to carry water to the area when wet sanding. When through - I use a hose to wash the area very thoroughly. At this point it is virtually impossible to detect imperfections in the Body Surface - so I'm not trying to perfect the body just clean the glass good and prepare it for basecoats. |
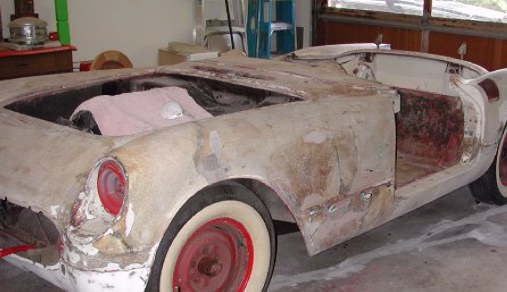
| I have sanded the
entire body and all those little nook and cranes that were hard to get into
with the stripper. This includes all the gutters around the engine,
trunk and convertible top deck lid. The tight areas around the parking
lights and grill. The taillights and exhaust bezel areas. Under
the wheel wells, around the door jambs and inside the gas filler area. At this point I inspect the body for detail that may have been lost in the stripping process or prior bodywork. I'm not concerned with major body panels - that will come later during the priming / sanding process. |
 |