Assembly
|
||||
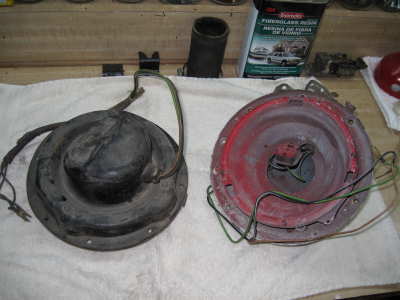
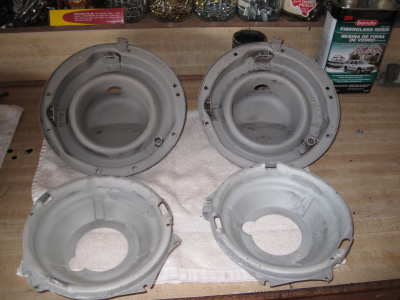
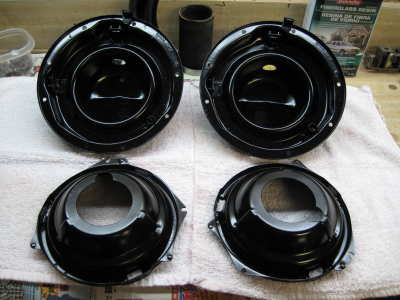
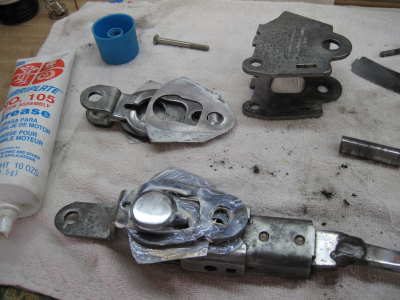
| All parts to be reassembled were taken apart sandblasted, repainted and re-assembled. I the case of lights and other electrical assemblies, all wiring and grommets were also replaced. | ||||
|
||||
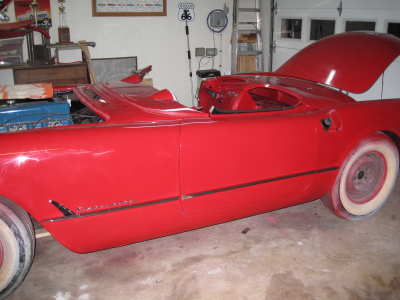
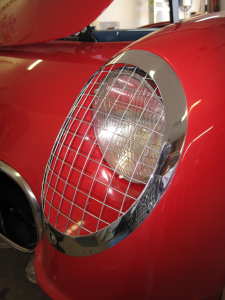
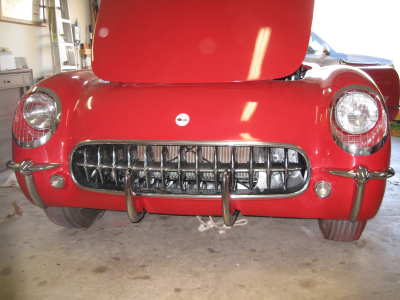
| Now we get to the fun part. It's hard to appreciate all the work that that's been done to this point. When you're through preparing one assembly, there's just another one that needs to be taken apart and redone. But from this point on, every job shows progress. I don't remember the fit of all the pieces being so bad when I took the car apart, but as I fit the car back together a lot of adjustment work is required to make it fit as good as possible. Some of the parts, like the door hinges, don't have any adjustment in them so I have to be a little creative on occasion, but even though not perfect, the patience required to put it together - take it back apart - make an adjustment - put it back together - to make it fit, is worth the effort. As I mentioned earlier - now is when you see the results of your previous efforts in a lot of cases. Remember back to the Detailing - where we built out the headlight wells to fit the grill bezels - look how well they fit now. There is no other way this adjustment could be made. I was able to trim the bumperettes and align them by routing out the mounting holes to accommodate their alignment. | ||||
|
||||
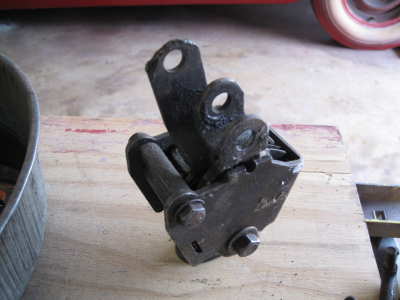
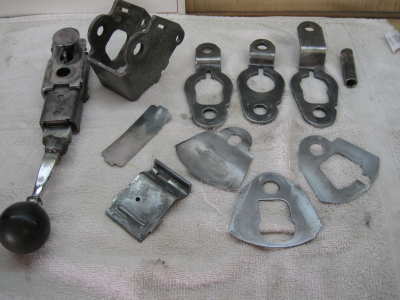
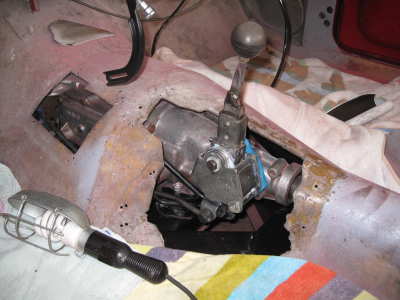
| Not necessarily as glamorous as the paint and trim, but equally as important - being a 4-Sp the shifter needed considerable attention. After total disassembly, I soaked the parts in my miracle solvent "kerosene" (if you haven't figured it out by now - I really like kerosene when cleaning almost anything). With a little wire brushing and a little Lubriplate the parts were ready to put back together. There's not much adjusting in a Hurst shifter, all the adjustment comes in the shift rods. Reassembled, lubricated and mounted properly, the shifter gives me a smooth shift. A joy to behold. Note the cutouts in the tunnel - to allow installation of the shifter and linkage. I molded a fiberglass cover for final assembly. |
Need a Tow
 |
 |
|
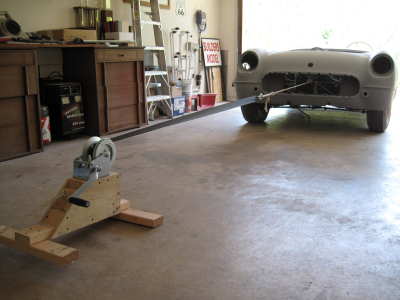
Pushing the car in and out of the garage became a real bore. So ,,,,,, I built a helper. I simply mounted an inexpensive boat winch on an inexpensive wood frame, added a few inexpensive eye bolts and inexpensive rope teathers and I had a wench to pull the car back into the garage whenever I needed to roll it out. Saves on the back. |
The winch came with a 30 ft nylon pull strap. I secure the other end of the winch to a door jam. Once the 54 is in, the winch can be disconnected and stored out of the way until needed again. Did I mention the wench was very inexpensive - certainly less than a chiropractor bill. |
Click here to jump to Assembly page 2